AUS
AUS USA
USA


.jpg)


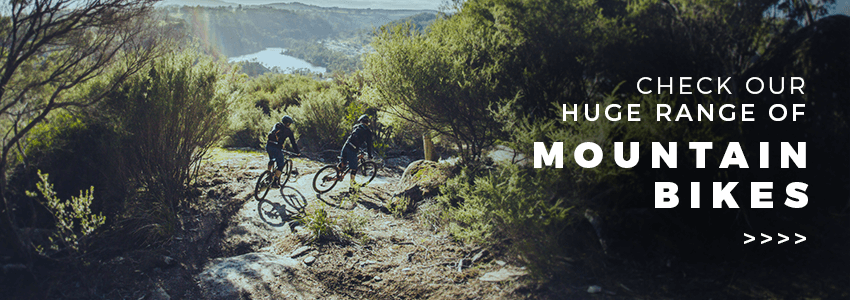
Rebound, Compression, SAG - What does all of this means?
Suspension can be a mind field, from your buddy who is an “expert” to the local shop guy out of their depth to the person that genuinely knows what makes excellent suspension systems. You can learn about suspension as deeply as you want.
We’ll be running a series of articles to take you from beginner to pro, even if you’re pro it is sometimes worth revisiting the basics. This first article will have you out the door, and down the trails, with some great performing suspension and in the next article we’ll start to look at suspension in more depth.
The key terms of suspension
- Hardtail: A mountain bike with only front suspension.
- Full sus/suspension: A mountain bike with bot front and rear suspension.
- Fork: A fork is the suspension at the front.
- Shock: Is the rear suspension unit.
- Travel: How much your fork or frame can compress.
- Stroke: The amount your shock can compress
- Pivot: The point where a bushing or bearing allows your frame to rotate.
- Linkage: The part of your frame between the pivots.
- Rebound: Is how your fork or shock returns to its original setting.
- Rebound damping. Controls the rate that your suspension rebounds.
- Compression: Is how your suspension deals with bumps.
- Compression damping. Adjusts the feeling of your suspension as it compresses
- Lockout: Lockout is a very firm compression setting, used for climbing and roads.
- Sag. When you sit on the bike how much the suspension compresses.
- Stanchion. The smaller round tube on your fork’s legs.
- Eye to eye length. How long your rear shock is.
- Shock stroke. The range of movement through your shock’s travel.
- Bottoming out. The noise when your shock reaches the limits of its travel.
- Pack out. Your shock didn’t have a chance to rebound and is now using less of it’s travel/stroke.
The basics of suspension
There are 3 basic reasons for suspension on bikes
- It isolates you from bumps, making riding more comfortable.
- It gives you more control, you shouldn’t get thrown about when you hit bumps. Your wheels should track the ground and not be deflected.
- It keeps your rear wheel on the ground, so when you pedal you’re moving the bike forwards.
Setting up your suspension
The first thing you’ll need to do when you get a new mountain bike, shock, or fork is set up your sag. You can also consider this as setting up your preload. As we said above sag, is how much your suspension compresses when you sit on your bike. By making sure this bit is right will make setting up the rest of your bike easier.
The first thing you’ll need to do is put on your usual riding attire. If you ride with a bag, get that on and your helmet and gloves. Now this setup will work with both coil and air sprung suspension, you’ll need to make sure you’ve ordered the correct coil spring for your weight though.
There are a few things you’ll need to do this:
- A tape measure
- A shock pump
- A reliable friend
Getting sag right
- The first thing you’ll have to do is note some numbers. A fork will be simple as you’re just noting the travel. With your shock you’ll need to make sure you take the correct number. On your shock you’ll see a metric number, such as 230 x 65. The first number is your eye to eye length and the second number is your stroke. Write down the stroke number. If you’re American this number will also be available in imperial.
- Now you need to don all your riding gear. Whatever you normally wear and take out on the trail needs to go on, including bags, goggles, gloves, and hydration packs.
- Now you want to have your bike somewhere where you can balance it in your preferred riding stance. By this we mean are you sitting down when you ride or standing up? Go for the position that you think will best benefit your riding style, not what anyone else tells you to do.
- Take your bike and bounce it. This will remove some of the stiffness in the suspension and it’ll feel open and ready to go, make sur that nothing is locked out and the fork and shock are both as open as they can be during this phase.
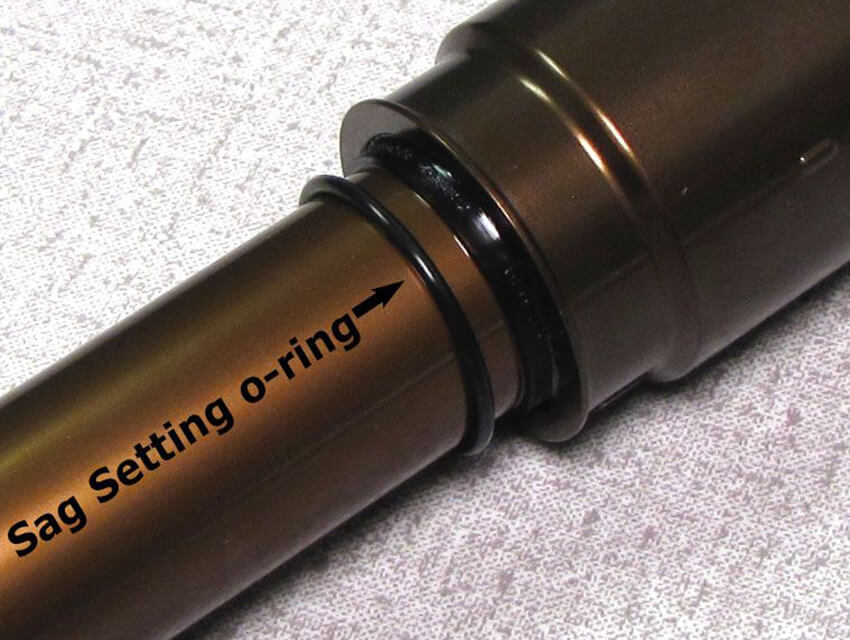
- Now if you have an air shock you’ll see an O-ring, move it down to the air chamber, this can be tricky as your still balanced on the bike so you could get that reliable friend to do it for you. If you don’t have an O-ring use a zip tie to do this. Don’t set it tight. Assume your riding position.
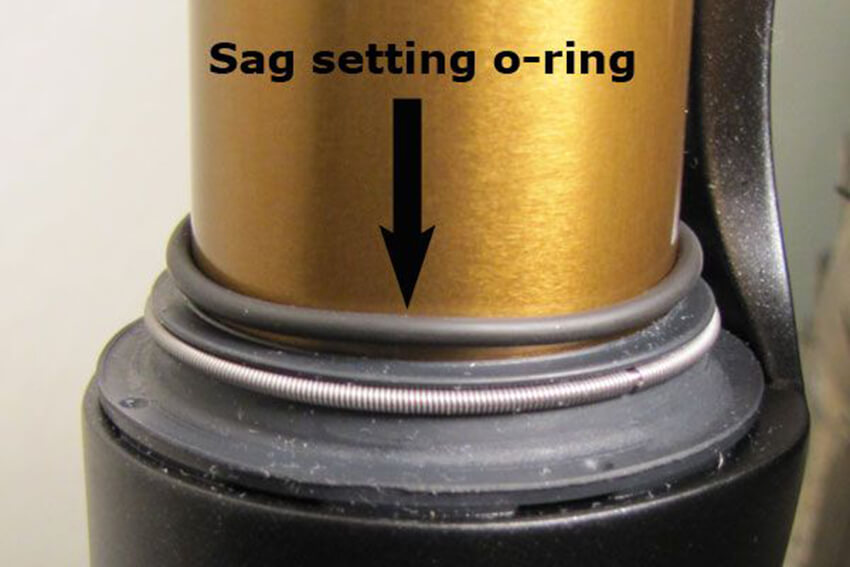
- Get off your bike gently. You’ll not want to further compress your suspension.
- You’ll now see that the O-ring, or zip tie, has moved. Don’t worry it was supposed to. You now need to do some sums. Measure the distance between the O-ring and the air chamber. You then need to work out a ratio. You take your travel or stroke distance and work out what percentage of that was just taken by the bike under compression. For instance a fork with 160mm travel and you just compressed 40mm means that you have 25% sag.
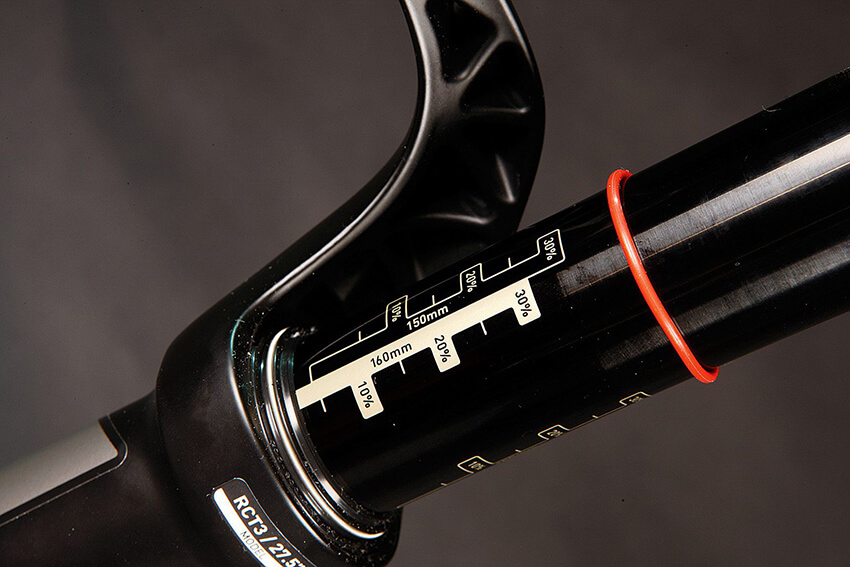
- If you have 25% your pretty much set to go ride. You’ll ideally want 25% to 30% sag, this can be subject to change due to manufacturer’s recommendations or just your own personal preference. If you need less sag put in more air pressure, if you need more sag remove some air. Work in 5psi increments as that’ll save you going past the correct point.
- Now for the fun part, get out and ride. See how you feel about your sag setting. Remember this part is all about how you feel. Generally though the more aggressive you are the harder your suspension needs to be.
Rebound settings
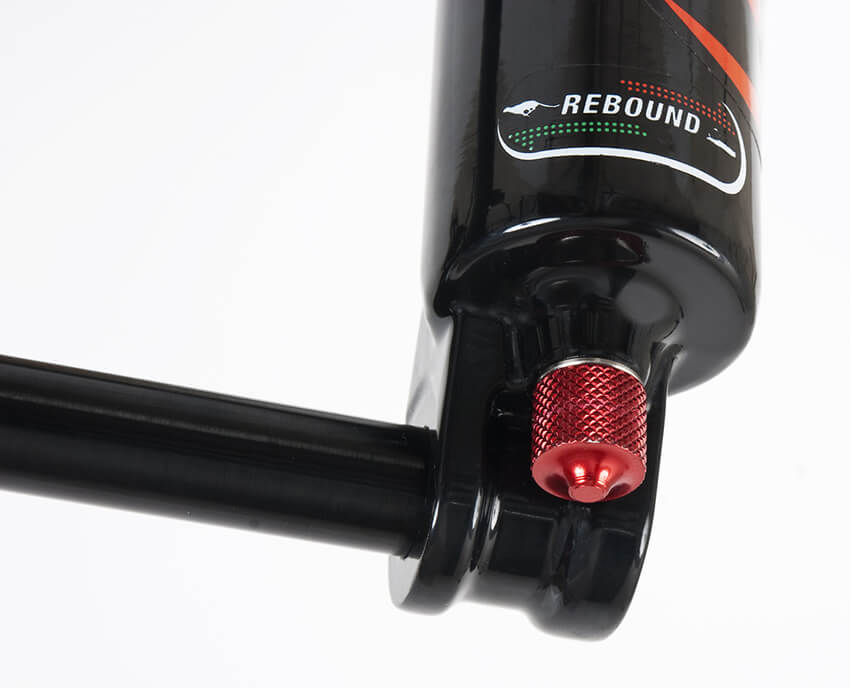
After getting your sag set, you can move onto getting your rebound set. You don’t want to be overthinking rebound, and you probably don’t want to be constantly making on the trail adjustments to rebound. If you are it probably means that something about your setup is not entirely correct.
The best way to set up your rebound is to get out into your street. In your street, you’ll find the perfect obstacle for setting rebound, a kerb. Rolling off a kerb is pretty similar to the general hits your bike will get when riding down a trail. You want the rebound to work as a single stroke action to when you roll off a kerb.
- Set your rebound to fully open/fast. RockShox nicely have a picture of a hare to let you know you’re heading in the right direction. Other manufacturers have their own symbols so check your manual and see what it is.
- Roll off your kerb. You don’t want to be moving your body around as you do this, you want to stay as still as possible and try and use the same position as you used when you set your sag.
- If you feel your fork go up and down more than once add some more rebound damping.
- Do this until your fork only goes through one shock cycle. You now have a baseline setting.
- If you have rear suspension now do exactly the same all over again.
Keep your rebound in harmony
You will also want to make sure your fork and shock match each other. Setting one with a fast rebound and the other slow will give you a little flying lesson out on the trail. It will also feel horrible. You want your suspension units to work in harmony with each other.
You can check your rebound settings are similar by bouncing down and back up while still in your street. You’ll want most of your weight on your feet when you try this. If your bike tries to throw you over your bars, then speed up your fork or slow down your shock’s rebound. If you feel you’re getting thrown backwards, then speed up your shock or slow down your fork. Eventually, you’ll get there, and you’ll be rewarded with great trail time.
It is worth knowing that if you decide you like less sag when we were setting up sag. Then your rebound damping is going to affect your spring force. Less sag means you’ll have to increase rebound damping to slow down the spring force.
How are your trails?
Now you have a baseline, note where your settings are, and you can always revisit them. You'll also want to fine tune from this baseline for your local trails, and if you go elsewhere, you'll again have a baseline to set up for new trails.
If you're hitting jumps or flowy trails, you'll want to slow your rebound down. If you're going to jump things, then part of the secret to getting air is to compress and then use your fork's rebound to help you. By slowing down your rebound, you're effectively making this much easier on yourself.
Rough and full of rock trails will benefit from a slightly faster rebound. The reason for setting your rebound faster here is that your suspension will be getting a lot of hits in a short space of time. You need your suspension to get back to its original position before the net hit. If it can't do this, your suspension will pack out.
Getting compressed
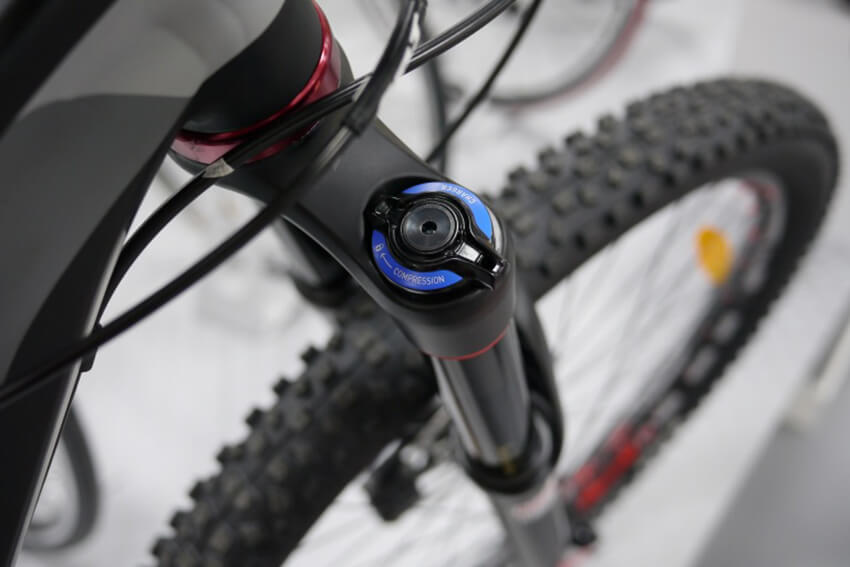
Compression is all about your feelings. Compression settings can change depending on the trail, how you’re riding that day, and just if you fancy a change. Compression is the one setting that playing about with and trying new settings can really change how much fun a ride is.
Like everything though it is good to have a baseline. Set your compression to either the fully open or lockout position. As you play around note how many clicks you have gone. Once you’ve found a position you like make a note of the number of clicks and then you can easily work out what you like or don’t like with compression.
Compression can come in low and high-speed variations. Most shocks only have the low-speed variety. If you need your suspension to feel supple and as if it is following the contours of the ground then pick the most open setting on your compression dial. If you feel your suspension moves too much when your riding, be it pedalling, braking aggressively, or firing around berms, then you’ll want to firm up your compression. If you keep firming up the compression dial, you’ll eventually lock out your suspension.
If you want to pay about with high-speed compression, it is worth going to a drop. Not a drop that you’ll feel lucky if you came out unscathed but one you would session with your friends out on the trail. When you hit terra firma after the drop, you can tell 1 of 2 things. If your compression wasn’t firm enough you’ll have bottomed out your suspension. If you go too far the other way, it’ll feel like you forgot to turn your suspension on and your arms will be sore. Dial your bike in using the drop, trying one or 2 clicks at a time.
Conclusion
Now, you’ll be desperate to go ride your new bike, so go and do that and remember and come back in the future and find out all about how to keep your suspension running and some simple upgrades that will make your bike yours, servicing and care is less scary than you think.